To Place the Compound Cell
-
Select the
 (
Compound Cell
Manager).
(
Compound Cell
Manager).
The Compound Cell Manager dialog opens.
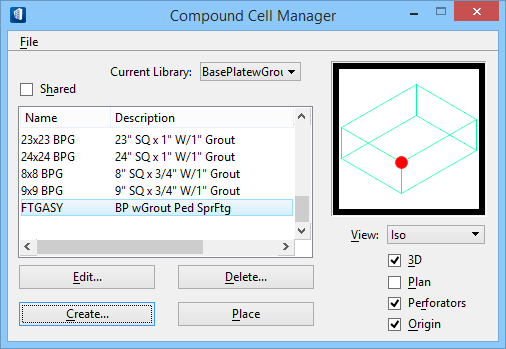
- In the Compound Cell Manager dialog, using the same cell library as before (BasePlatewGrout), scroll down in the cell name list box until you locate FTGASY. Select that cell, and notice that the preview pane in the dialog reflects your newly defined cell.
- Click Place. The Place Compound Cell dialog opens. Accept all the defaults in that dialog, and move your pointer into the design window. Notice that the cell shape is attached to your pointer. Your status bar prompts you to Enter Compound Cell origin.
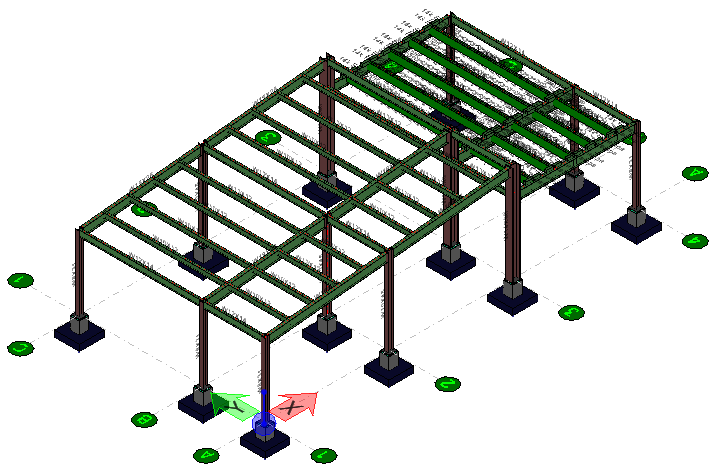
- Position the pointer at the base of another steel column until the structural snap icon appears indicating an exact placement at the bottom of the column, and enter a data point to place the cell. The status bar prompts you to Define Compound Cell direction, so orient your AccuDraw compass by pressing <E>. Move your pointer in the positive X direction, press <Enter> to enable the X-axis Smart Lock, and place a data point.
- Now place the footing assembly cell beneath each steel column in the model so that your design looks like this example:
-
Commit Changes (
 ) to design history
The Commit Changes text box appears. Enter your comments (such as Added footing assembly to all columns), then click OK.
- (Optional)
Select the
Show Design
History(
 ) tool.
The Design History dialog appears and is updated with your latest comments.